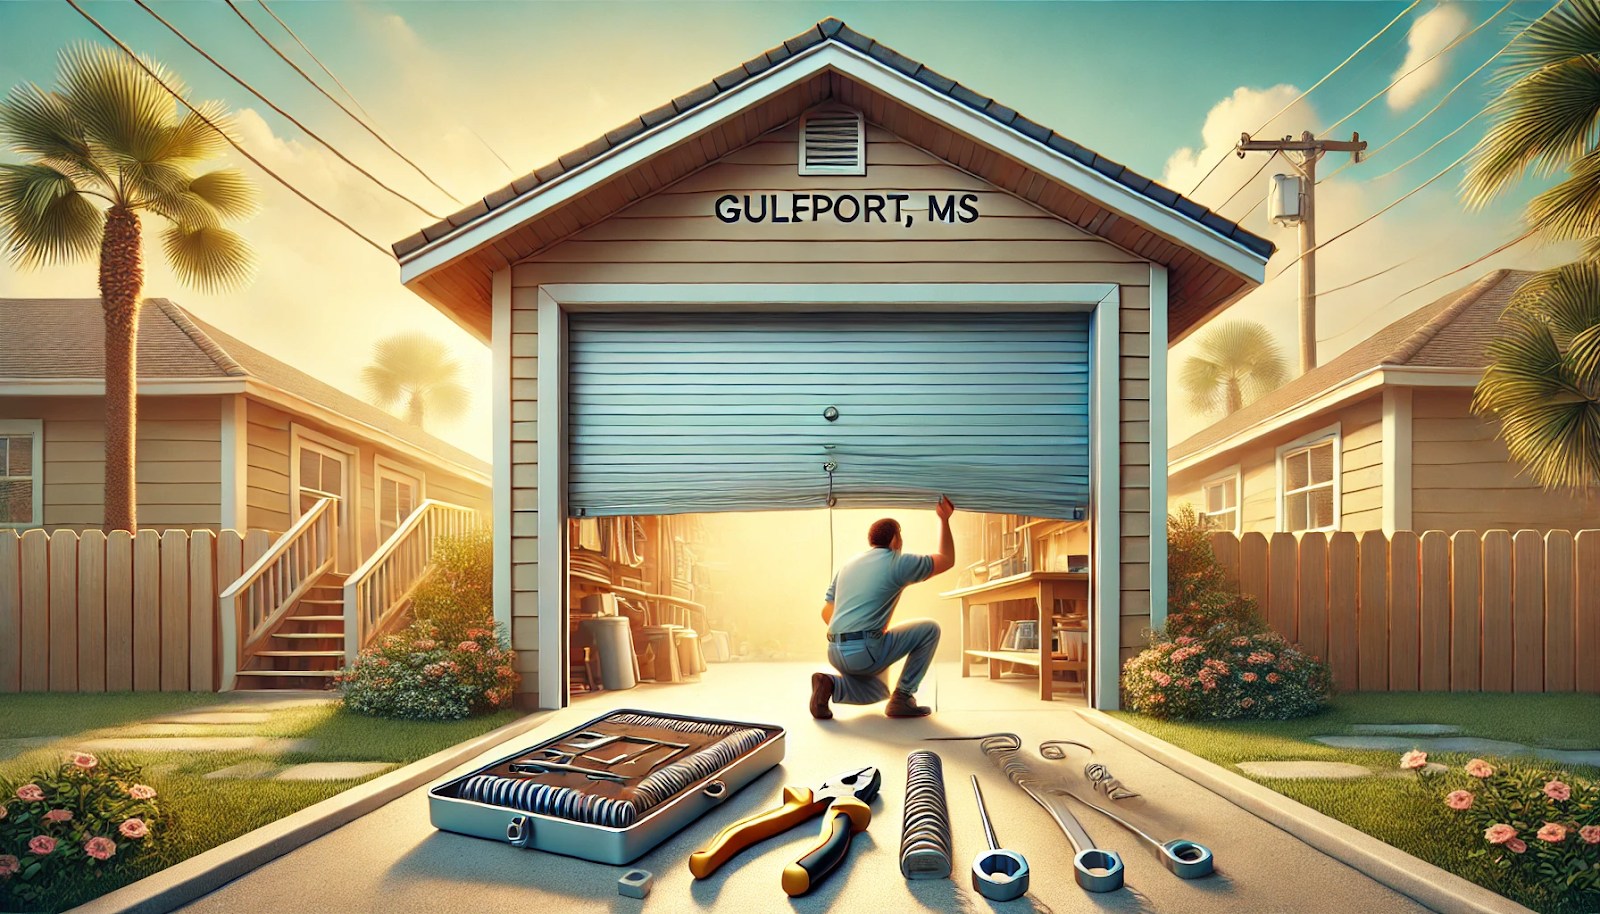
Ready for a DIY project? Our Gulfport, MS tutorial on garage door spring replacement takes you through each step for a safe and efficient repair.
If you’re a homeowner, chances are you’ve encountered issues with your garage door at some point. One of the most common problems is a faulty garage door spring. Garage door spring replacement is essential to maintaining your door’s functionality, but it can be a daunting task for those unfamiliar with the mechanics. In this guide, we’ll walk you through everything you need about garage door spring replacement, from understanding how springs work to the step-by-step process of replacing them safely.
Garage door spring replacement is a task that most homeowners will face eventually. The springs are responsible for lifting the heavy door; over time, they wear out, break, or lose their tension. Ignoring a faulty spring can lead to further damage to your garage door system or even dangerous accidents. Fortunately, replacing a spring doesn’t have to be an overwhelming experience. With the right tools, knowledge, and safety precautions, you can restore your garage door to its full functionality.
Understanding Garage Door Springs
Garage doors operate through a counterbalance system, which uses springs to offset the door’s weight, making it easy to open and close. There are two main types of garage door springs:
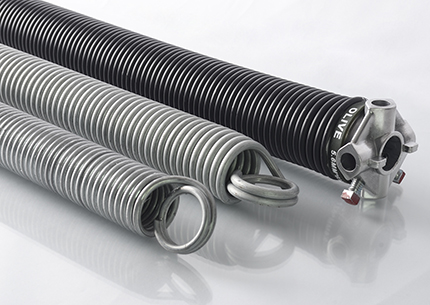
1. Torsion Springs
Torsion springs are the most common type found in modern garage doors. They are mounted horizontally above the door and work by twisting as the door lowers, storing energy. When the door is raised, the springs unwind, releasing the stored energy to lift the door.
Torsion springs are known for their durability and longevity, often lasting 10,000 to 20,000 cycles, depending on their quality. However, replacing them can be dangerous if not done properly because they are under extreme tension.
2. Extension Springs
Extension springs are typically found in older garage doors and run parallel to the horizontal tracks on either side of the door. These springs extend and contract as the door is lowered and raised. While less common today, they still exist in many homes, are more affordable, and have a higher risk of failure.
Extension springs are often easier to replace for DIY enthusiasts because they don’t require the same level of tension management as torsion springs. However, they are more prone to wear and may require more frequent maintenance.
Signs Your Garage Door Spring Needs Replacement
Before diving into the replacement process, it’s important to recognize when your garage door spring is failing. Here are some signs that indicate it’s time for a new spring:
- The Door Won’t Open Fully: If your garage door only opens a few inches and stops, it could be a sign that the spring has lost its tension or is broken.
- Heavy Door: If your garage door feels unusually heavy when you try to lift it manually, the spring is likely worn out. The spring counterbalances the door’s weight, so a heavy door is often a sign of spring failure.
- Gaps in the Spring: A visible gap in a torsion spring means it’s broken and needs immediate replacement. Extension springs may also show signs of elongation or warping.
- Loud Bang: Springs can snap suddenly, causing a loud noise like a gunshot. If you hear this sound and the door won’t operate, a broken spring is likely the culprit.
Choosing the Right Replacement Spring
When it comes time to replace your garage door spring, it is important to select the correct type and size of spring for your specific door. Using the wrong spring can lead to frequent breakage or improper door function.
Torsion Spring Selection
Torsion springs vary in length, wire size, and the amount of tension they can handle. The color-coded end on torsion springs typically indicates the spring’s tension rating. When replacing your torsion spring, measure your old spring’s length, inside diameter, and wire thickness to ensure an exact match.
Extension Spring Selection
Extension springs are generally easier to replace because they come in standardized lengths and tensions. However, choosing one that matches the weight and size of your garage door is still important. Many extension springs are labeled with a color code corresponding to their weight capacity.
If you are still determining the type of spring you need, consider consulting a garage door professional to avoid costly mistakes.
Tools and Materials Needed for Replacement

Replacing a new garage door spring requires specific tools and materials to ensure the job is done safely and efficiently:
- Winding bars (for torsion springs)
- Wrenches (particularly a socket wrench)
- Locking pliers or C-clamps
- Safety glasses
- Gloves
- Replacement springs (be sure to purchase the correct type and size for your door)
- Ladder
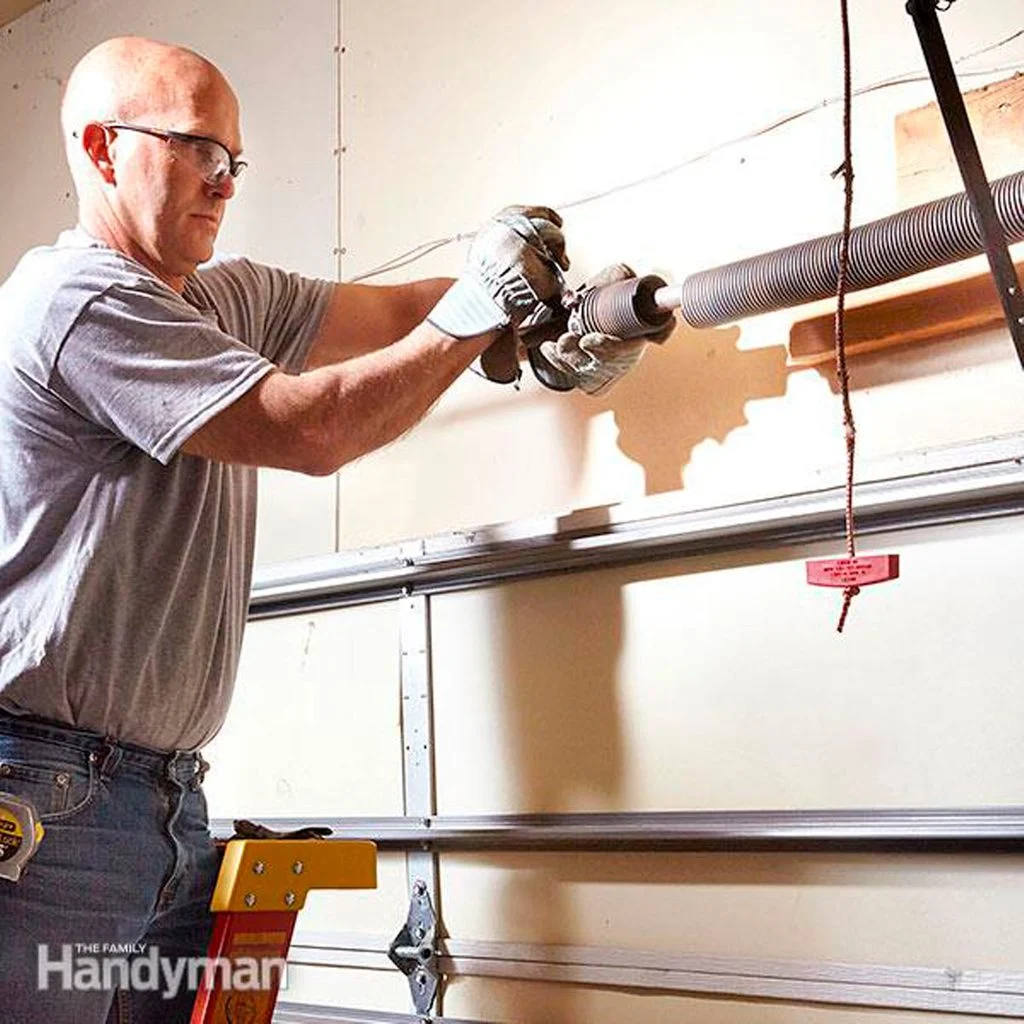
How to Replace Garage Door Springs (Step-by-Step)
Replacing a garage door spring is not a DIY project for the faint of heart, but if you’re mechanically inclined and cautious, you can tackle this project yourself. Below is a step-by-step guide primarily for torsion spring replacement.
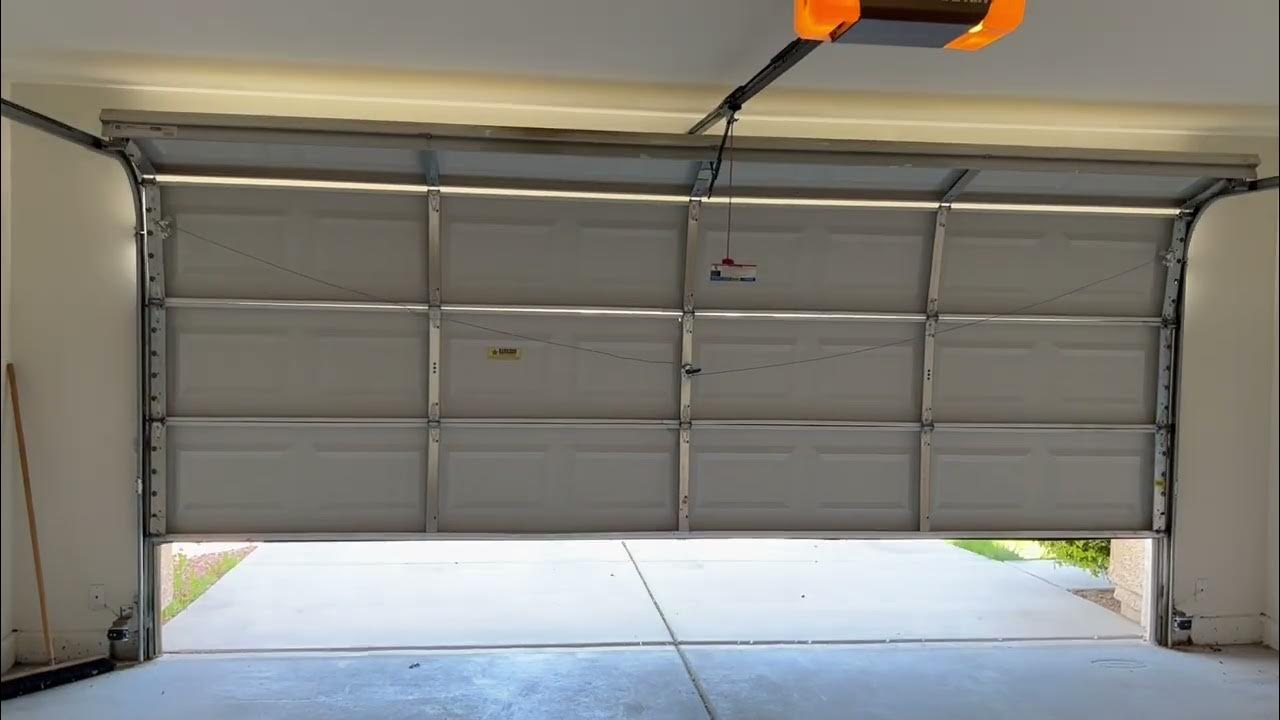
Step 1: Disconnect the Garage Door Opener
Safety is paramount, so the first step is to disconnect your garage door opener. This ensures that no one accidentally operates the door while you’re working, which could cause serious injury.
Step 2: Secure the Door in Place
Use locking pliers or a C-clamp to secure the garage door to the track, preventing it from moving during the replacement process. This step is crucial for your safety.
Step 3: Loosen the Unbroken Spring
Using your socket wrench, begin loosening the set screws on the winding cone of the unbroken spring. Keep the winding bars firmly inserted into the winding cone while doing this, as the spring will be under tension. Rotate the bar slowly to unwind the spring, releasing the stored tension.
Step 4: Remove the Broken Spring
You can remove the broken spring once the tension is released from both springs. Use your wrench to remove the bolts holding the spring in place and carefully slide it off the torsion bar.
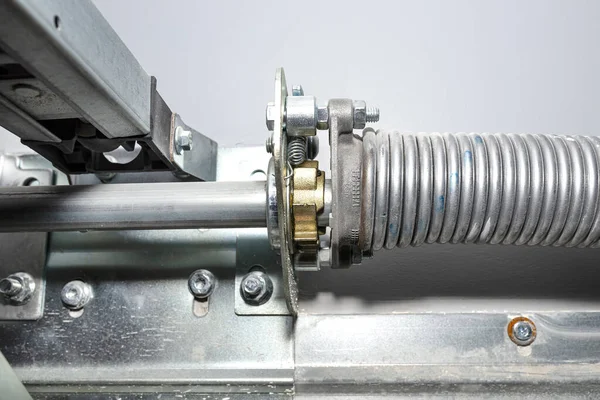
Step 5: Install the New Spring
Slide the new torsion spring onto the bar, ensuring it’s oriented correctly. The red winding cone goes on the left side of the door, and the black winding cone goes on the right. Secure the spring with the bolts you removed earlier.
Step 6: Wind the New Spring
This step requires caution. Using your winding bars, begin winding the spring according to the manufacturer’s instructions. Most garage doors require between 30 and 40 quarter turns to wind the spring fully. Be sure to count your turns to ensure the correct amount of tension.
Step 7: Tighten Set Screws and Test
Once the spring is fully wound, tighten the set screws to hold it in place. Afterward, carefully remove the locking pliers or C-clamp and reconnect the garage door opener. Test the door several times to ensure it opens and closes smoothly.
Preventive Maintenance for Garage Door Springs

Even though garage door springs will eventually wear out, you can take some steps to prolong their life:
- Lubricate the Springs Regularly: Keeping your springs lubricated helps reduce friction and prevents rusting. A silicone-based spray is ideal for this purpose.
- Inspect Springs Periodically: Look for signs of wear, such as rust, coil gaps, or elongation in extension springs. Catching these early can help you replace the springs before they break.
- Balance Your Door: A well-balanced door puts less strain on the springs. Test your door balance by disconnecting the opener and manually moving the door halfway. If it stays in place, it’s balanced. If it moves up or down, it may need adjusting.
- Limit Garage Door Usage: While this isn’t always practical, limiting the number of times you open and close the door can extend the life of the springs. The fewer cycles they complete, the longer they’ll last.
DIY vs. Professional Installation: The Pros and Cons
When faced with a broken garage door spring, the question arises: should you replace it yourself or hire a professional? Both options come with their pros and cons.

DIY Installation: Pros and Cons
Pros:
- Cost Savings: One of the biggest benefits of DIY spring replacement is saving money. Professional services can cost upwards of $300, whereas purchasing the spring and tools yourself may cost significantly less.
- Immediate Repair: If you’re handy and have the necessary tools, you can fix the problem immediately without waiting for an appointment.
Cons:
- Safety Risks: Garage door springs are under high tension, and mishandling them can result in severe injuries. If you’re unfamiliar with the mechanics, leaving this task to the professionals is best.
- Time-Consuming: For those who are not experienced, the process can take hours, and mistakes could result in a non-functioning door.
Professional Installation: Pros and Cons
Pros:
- Safety: A professional technician is trained in handling high-tension springs and can perform the job safely.
- Warranty: Most professionals offer warranties on their work, giving you peace of mind that the job is done correctly.
- Expertise: A professional can inspect other parts of your garage door system and address potential issues.
Cons:
- Cost: Professional service comes at a higher price, typically between $200 and $300, depending on your location and the spring type.
How Long Do Garage Door Springs Last?
On average, a garage door spring lasts between 7-12 years, depending on its quality and how often you use it. A typical torsion spring is rated for 10,000 cycles, with one cycle equating to the door opening and closing once. If you use your garage door multiple times a day, the lifespan of your spring will naturally decrease.
The Cost of Replacing Garage Door Springs
The cost can vary if you’re wondering about the financial aspect of garage door spring replacement. Hiring a professional to replace garage door springs will cost between $200 and $300, depending on your location and the spring type. For those opting for a DIY approach, springs typically cost between $30 and $100, but remember, professional expertise and safety value should not be underestimated.
FAQs on Garage Door Spring Replacement
How much does it cost to replace a coil spring on a garage door?
The cost to replace a garage door coil spring typically ranges from $150 to $350, depending on the type of spring and labor costs. Torsion springs tend to be more expensive than extension springs. DIY replacement can save on labor, but professional installation is recommended for safety, which may add to the overall cost.
Can I open a garage door with a broken spring?
You can open the door manually if a spring is broken, but doing so is heavy and dangerous. Garage door openers aren’t designed to lift the full weight of the door without the spring’s assistance. It’s best to avoid using the door and contact a professional for a garage door repair.
Should you replace both garage door springs at the same time?
Yes, if one spring breaks, it’s advisable to replace both, especially if they’re the same age. When one spring fails, the other may soon follow. Replacing both ensures balanced tension, preventing uneven wear and strain on the door and opener.
Should you lubricate your garage door spring?
Yes, lubricating garage door springs help reduce friction and prolong their life. Use a silicone-based or lithium grease spray to lubricate the spring about twice a year. Avoid heavy oils like WD-40, as they attract dust and grime.
How many springs are on a garage door?
Most residential garage doors have two springs, one on each side, to evenly balance the door’s weight. Larger or heavier doors may require additional springs for extra support. Some smaller or lighter doors may only have one spring.
Conclusion
Replacing a garage door spring is a task that requires careful attention to detail and strict safety precautions. While a DIY enthusiast might be able to tackle this job with the proper tools, for many homeowners, calling in a professional is the safer and more reliable option. Understanding the signs of a broken spring, knowing the replacement process, and recognizing when it’s time to seek expert help will keep your garage door running smoothly for years.
End Note
At Doorways, Inc., we’re dedicated to providing top-notch service and expertise, whether you’re dealing with a garage door spring replacement or exploring our extensive product offerings. For residential needs, we offer a full range of services, from our Residential Garage Door Collection and reliable service and repair to high-quality garage door openers and accessories. Our team ensures your home’s garage door remains functional and secure year-round. Check out our residential services at msdoorways.com/residential.
For commercial projects, we supply Overhead Doors, Fire Doors, and Hollow Metal Doors and Frames, among others. We also specialize in Glass Doors, Commercial Door Operators, and essential Loading Dock Equipment. Need custom solutions? We’ve got Specialty Products tailored to meet unique demands. Learn more about our commercial solutions at msdoorways.com/commercial.
If you’re interested in joining our team or have questions, visit our Careers, Contact Us, or About Us pages. Explore our latest updates on the blog, and see how Doorways, Inc. can open doors for you!